WRMD Import
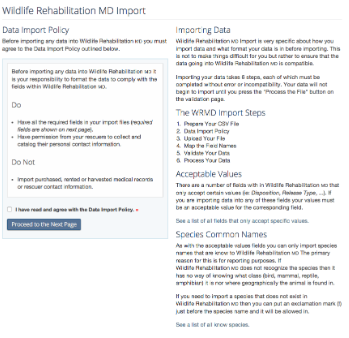
One of the neat extensions that we have created in WRMD is “WRMD Import”. If your facility has digital records from past years, you can import these records into the current system. In order to do this, the information has to meet certain standards. Basically, it has to match what the terms and formatting are, in WRMD.
Since “WRMD Import” is an extension it first has to be activated in order to use it. Once activated it will show up on the far left under “Extension Settings” as “WRMD Import”. When you click on this it will take you to a page that is full of information. Importing is a relatively easy process itself, but cleaning up the data is tedious, that is the reason for all of the instructional material.
There are certain fields that you can import and certain ones that you can not. To start with, importing just the required information is a really good start for most past year records.
The required fields are as follows:
Case Number:A unique incrementing integer that is assigned to each case.
Case Year:The 4 digit year (ex: 2015) that the animal was admitted to your clinic.
Disposition:The final or current disposition of the animal chosen from the available disposition options.PendingReleasedTransferredDead on arrivalDied +24hrDied in 24hrEuthanized +24hrEuthanized in 24hrVoid
Species:The common species name of the animal, matching a known species in Wildlife Rehabilitation MD. You can find this list here.
Date admitted:The date the animal was admitted to your clinic in YYYY-MM-DD format.
So, ideally what you have is an excel type spread sheet with this information on it. As you see from this list some of these require very specific formatting. This is required, because the database has to recognize the information for what it is. To view a list of the other accepted values, you must be signed in and have the “WRMD Import” activated. Once it is activated you can view that information here.
Hopefully, once you have your data prepared, you then need to move it into a .CSV (comma separated values) delimited file. Once that is accomplished you can follow the basic steps for import.
The WRMD Import Steps:Prepare Your CSV FileData Import PolicyUpload Your FileMap the Field NamesValidate Your DataProcess Your Data
Validating your data will be the hardest part. If one thing is off and the database doesn’t recognize something you have to change that info on your file and then start all over again with a new CSV file.
It can be a long tedious process, but if you can spend the time to get all your information correct to begin with, it will make the import process much easier and smoother.

